
Set up automatic alerting.
Alerts make sure you, your customers, and the systems that need intelligence are notified the moment something relevant comes in. You define a rule from criteria such as specific threats, regions, sectors, or assets, decide how strictly events must match, and choose where matching events are delivered. From then on, any new event that matches is routed automatically in the right format for each destination.
How to create an alert
- Go to Alerts in the sidebar and click Create New Alert.
- Give the alert a name, for example "Infostealer threats to the financial sector".
- Select your criteria (see the table below).
- Choose the match logic: ALL or ANY.
- Choose the destinations the alert should be sent to.
- Activate the alert (it is enabled by default) and create it.
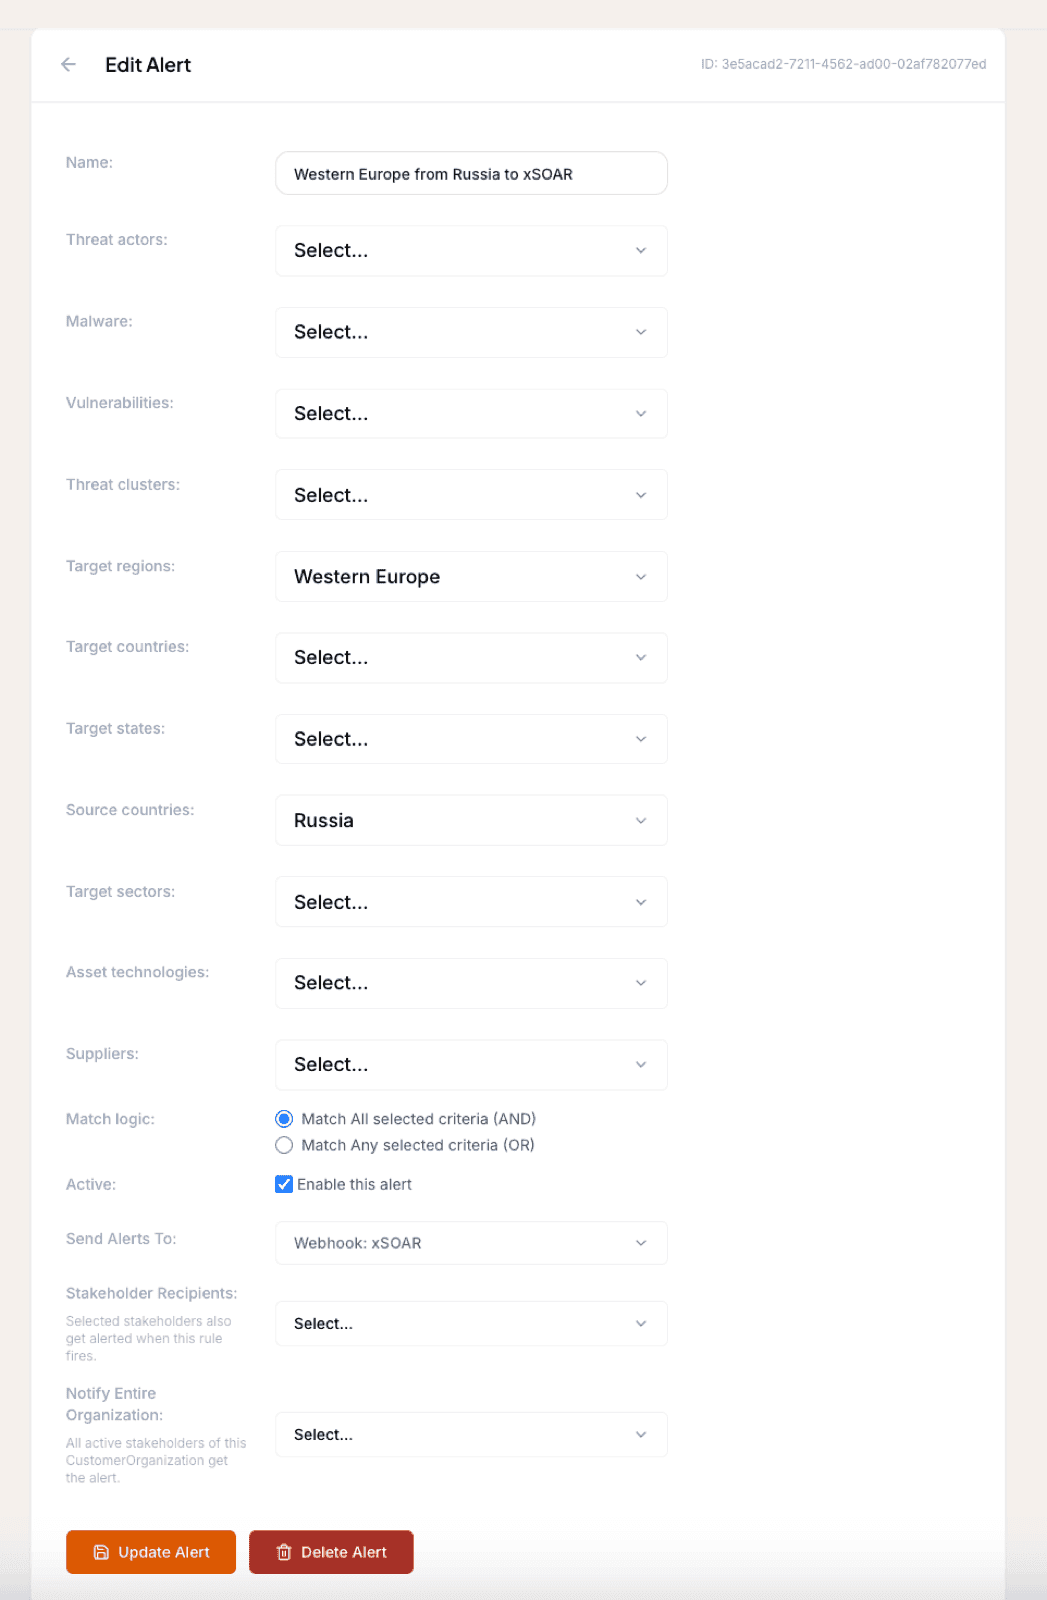
Alert criteria
You can combine any of these criteria in a single rule.
| Criterion | What it matches |
|---|---|
| Threat Actors | One or more actors from your Threat Library |
| Malware | One or more malware families from your library |
| Vulnerabilities | One or more vulnerabilities from your library |
| Target Regions | Regions you want to watch for targeting |
| Target Countries | Countries you want to watch for targeting |
| Target US states | Specific US states you want to watch |
| Source Countries | Where the threat originates, for example Russia, China, Iran, or North Korea |
| Target Sectors | Sectors you want to watch |
| Asset Technologies | Technologies in your organizations' asset lists |
| Suppliers | Suppliers in your list |
Match logic
Decide whether the rule should match ALL of the selected criteria together, or ANY of them. ALL is the right choice when an event must satisfy every criterion, for example a particular sector and a particular malware at the same time. ANY is the right choice when you want to be alerted if any single criterion is met.
Destinations
Choose where matching events should go: your own email address, any of the webhooks or MISP integrations you have set up, any of your Stakeholders, or entire Organizations. You can also route alerts to a Slack channel once that module is configured. Each destination receives the alert in the format relevant to it.
Ransomware domain alerts are configured elsewhere
One kind of alert does not live here. Ransomware leak-site claims that name a domain you care about are matched on the domain itself rather than on the criteria above, so they are configured separately, in your billing account settings, and only an Owner or Admin can change them. They use this same destinations picker once turned on. See Configure ransomware domain alerts.
Turn on alerting for a saved search
If you have already built the criteria as a saved search, you don't need to rebuild them in an alert rule. On the Searches page, click the bell icon (Turn on alerting) on any saved search. Liberty91 creates an alert with that search's criteria and name, then opens the full alert configuration, where everything a normal alert supports is available: recipients, stakeholder recipients, whole-organization notification, and the email, webhook, Slack, and MISP integrations.
On an alert created this way, the criteria live on the saved search rather than on the alert. The alert page shows them read-only, with a link back to the search. To change what the alert matches, edit the search; the notification settings stay on the alert. This split means one set of criteria can drive your searching, reporting, dashboards, and alerting at the same time, without drifting out of sync.
Alerts you created before saved searches existed keep working unchanged, and each one now has a matching entry on the Searches page named after the alert. That lets you reuse an existing alert's criteria for searching, reporting, and Team Dashboards.